



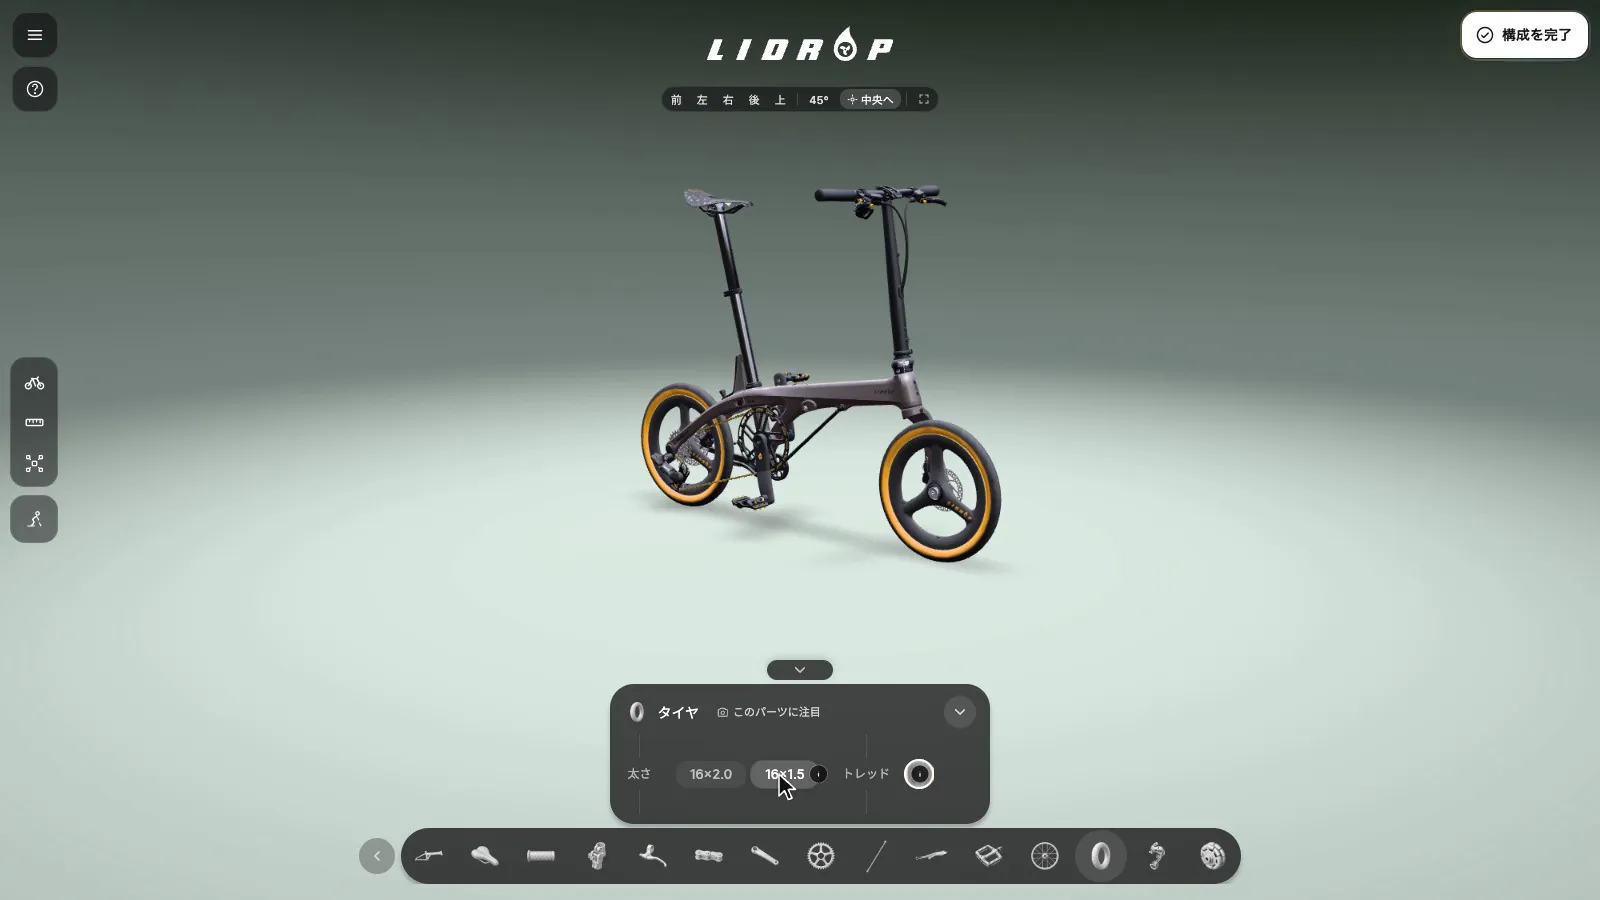
The online 3D configurator the POLISH team built for LIDROP swaps the full 3D bike underneath the moment a customer changes an option on screen. The H6 has 15 swappable parts and 15 frame colors, plus two grades, Pro and Ultra, and four styles.
The POLISH team split the configurator into four layers: how the model is split, how rules block invalid choices, where the data comes from, and how a finished configuration is handed off. The folding animation and the head tube parts in the first layer took the most work, and performance runs through all four. The sections below cover the approach for each layer and the reasons behind it.
Layer 1: Splitting the model
A full 3D bike stays loaded at the bottom of the screen, with a transparent options interface layered on top. The main bike file holds only the frame and empty mounting points. Each swappable part is its own model, all sharing one coordinate system, so the parts stack directly into a complete bike. Changing a style loads no new file. It shows and hides parts based on the prefix of the part name, which the industry calls the node name.

Part names are the contract between the model and the code
Parts follow the frame as it folds because of a naming rule: on every animation frame, the code uses the part name to bind the part to the main bike skeleton. The name is therefore the contract between the model and the code. When a modeler delivers a new model, its part names are checked against the binding rules before it goes live, and it is added only if the names match.
The second bike shares the same binding calculation. To make that work, its part names are first mapped back to the canonical H6 names.
Folding: the equipment changes the height before and after the fold
The hardest part of the folding animation is that it has no fixed end point. Change the equipment or the cabling, and the height before and after folding changes, along with the frame where the animation stops. The H6 main model holds four folding animations: the four head tube styles fall into two groups, and each group has one version with the reinforcing stand and one without.
| Equipment changed | What changes with it |
|---|---|
| Wheel size and tires | Folded height is 635 mm with 305 wheels and 665 mm with 349 wheels, and unfolded handlebar height differs by 28 mm. The ground re-aligns to the lowest point of the tires. |
| Head tube style | The four styles fall into two groups, each with its own folding animation. Handlebar height differs by 50 mm between the 9° and 15° angles. |
| Push wheels | The height-adjustable style sits higher. The 80-frame folding animation has to stop at frame 55, because folding further presses the bike into the wheels. |
| Reinforcing stand | It deploys only after the bike is folded. With it fitted, the main model and the chain both play a different folding animation. |
| Saddle bag | It hangs under the saddle, so the saddle drop during folding is capped. Any lower and the saddle would press into the bag. |
So the end point of the fold depends on the current equipment and cannot be a fixed value in the code. When the push wheels are swapped on a bike that is already folded, the bike eases to the new end point over 0.45 seconds, and the main model and the chain run the same code, so the two stay together. The saddle lowers automatically during the fold and returns to the height the customer set when the bike unfolds.
The chain has its own skeleton and folding animation, built for the folding path of that frame, so the two bikes cannot share one. After folding, both wheels sit to one side, so the rotation center is reset to the center of the visible bike, which keeps the bike in the middle of the screen as it turns.
The head tube: parts that constrain one another
The folding head tube is the most connected part of the bike. The grips, brake levers, shifter, and the optional controller, display, front light and head tube bag all mount on it. The four head tube styles differ in height and handlebar shape, and two styles sit 6.9 cm apart, so changing the head tube moves everything mounted on it.
- The customer picks another head tubeFour styles
- The style settles three thingsAlignment point, cables and fold group
- Grips, brake levers, shifter and optional front partsThe whole set moves to the new alignment pointOne alignment point carries every part
- Brake and shifter cablesA different cable is shownEach head tube style has cables already in position
- Main model foldingA different fold group playsThe four head tube styles form two groups
The team uses one head tube style as the baseline and places an alignment point on each of the other three, and every mounted part takes its position from that point. One alignment point carries several parts, so the math cannot move a single part on its own. Fine adjustments go back to the model as a rule, rather than stacking patches in code.
Cables are the exception. Brake and shifter cables bend along paths that change with the head tube, so a cable cannot simply move across. Each head tube style has cables already modeled in position: eight brake cables across the four styles, split between mechanical and hydraulic, and one shifter cable per style, with none for electronic shifting. The code only shows the cable that matches the head tube, brake and shifter choices. Acceptance measures the distance between each cable and its brake lever vertex by vertex.
Chains preload; switching bike models reloads the page
The chain is the only part where a single swap reloads an entire model, because a different tooth count means a different file. So the scene preloads every chain for the selected bike model on entry, and afterward only switches between the chains without unloading any.
Switching the bike model reloads the whole page, which is what actually releases the memory. 3D changes are verified on real devices, because automated test environments do not render 3D reliably.
Layer 2: Blocking invalid combinations
Not every part can be installed at the same time. A rules table blocks the combinations LIDROP cannot build: when a customer taps a conflicting part, the screen first explains why, then switches to a combination that works once the customer confirms. For example, the E-Bike drive fits only on Pro. The rules live in the front end rather than the database, because a database condition can only be written as “what is selected in the other categories” and cannot express “depends on size.”
Test rules for both adding and removing a part
The most common rule is “A needs B”: choosing A requires B to be present. Such a rule has to check which part was just tapped, so it can tell whether the customer is adding or removing. A type checker cannot tell whether this logic is right. Only tapping through it does, so both directions need testing.
Layer 3: Sourcing the data
Option names, specs, weights and thumbnails are all data. LIDROP's specs were first organized in Excel. The backend database is now the source of truth, with a static fallback copy alongside it. The admin panel can edit only names, thumbnails, weights and specs. The number of parts is set by the models, so adding a part requires a new model first.

One codebase produces both the international site and the China site, with an interface in six languages: Traditional Chinese, Simplified Chinese, English, German, Japanese and Korean. Translations of option names come only from the six-language columns in the backend database. A live admin warning and an audit script mean a missing translation is found without waiting for a customer to see it.
The front end hardcodes no specs; a missing value shows a dash
The front end hardcodes no spec constants. Names, weights, number of speeds and tooth counts all come from the data. When the number of speeds or the tooth count cannot be read, the configuration card shows a dash (—) and no default value stands in. The card and the spec PDF leave with the customer, and a blank is better than a wrong printout.
Data source
- Backend databaseSource of truth; six-language columns
- Static fallbackA separate copy
Front end
- One codebaseInterface in six languages
Sites and customer documents
- International site
- China site
- Configuration card
- Spec PDF
Missing valuesThe configuration card shows a dash for missing speeds or teeth.
Keep the dimension frame and the official numbers separate
The screen can mark the bike's dimensions. The numbers displayed follow the officially published values, while the outline drawn comes from the model geometry with manual fine-tuning. The two are kept separate.
Data entered by the user
Fit analysis drives a 3D rider from height, leg length and arm length, and marks joint angles and the weight distribution between the front and rear wheels.
Limb lengths are hard to measure, so there is a “fill in from a photo” option: the pose recognition model runs on the user's own device, the team hosts the model file itself, and the photo never leaves the device. A wrong height cannot be caught mathematically, so results are always editable and plainly labeled as estimates. The copy follows one principle: disclose only, never recommend. No scores, no red-yellow-green marking, no “suggested adjustment” wording.
Layer 4: Handing off the configuration
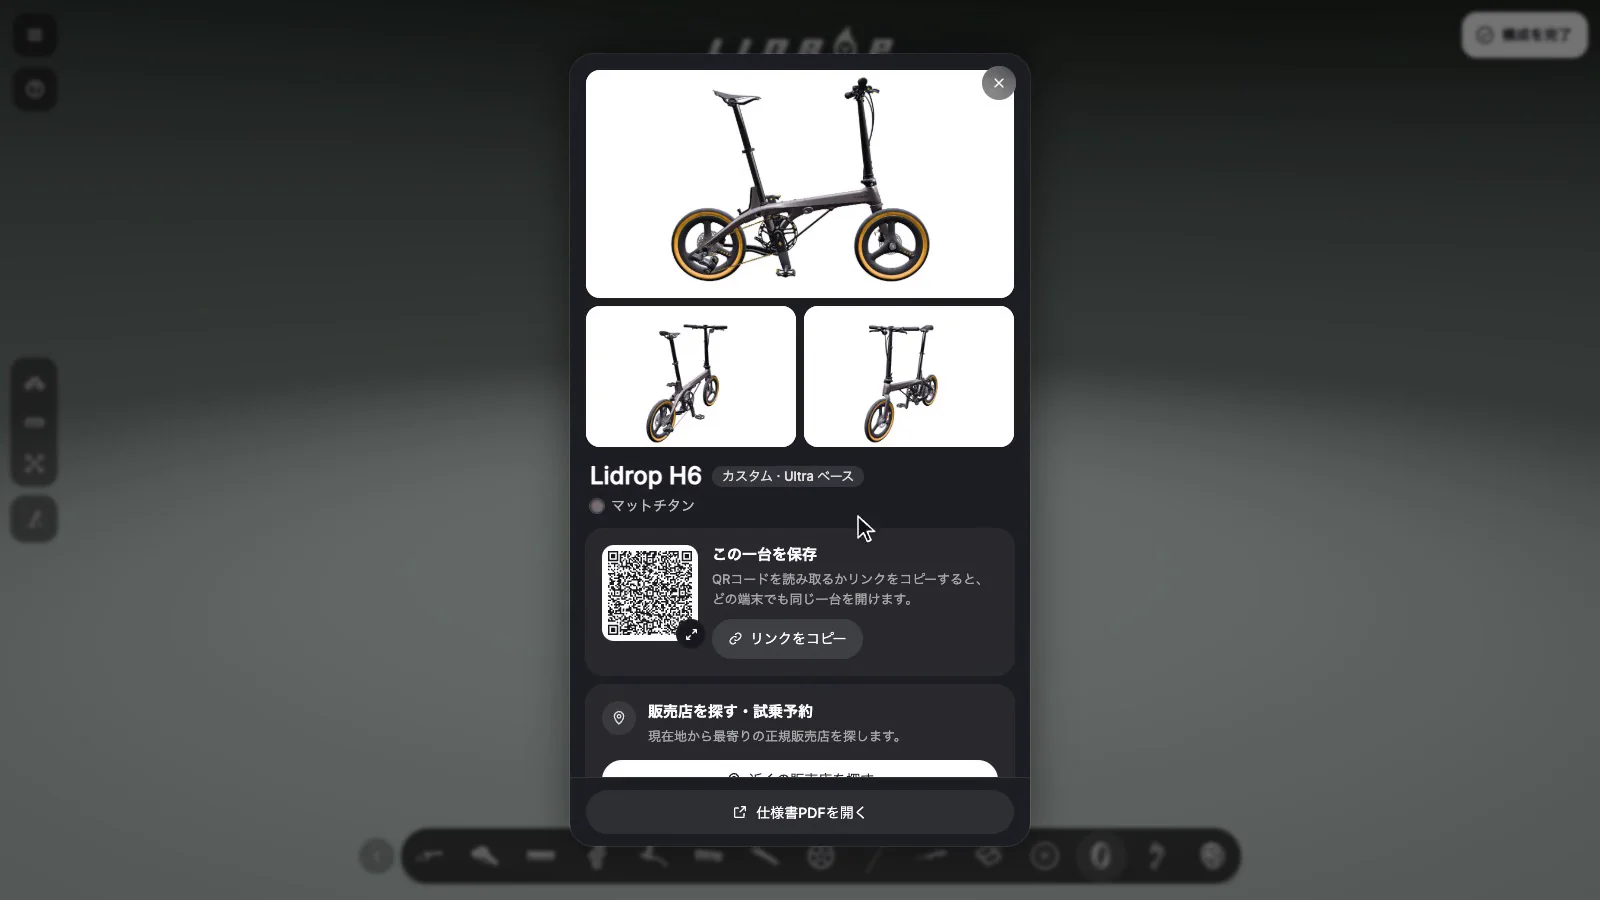
The configuration card holds a three-view image of the full bike, per-part specs and weights, a QR code and a spec PDF. Scanning the QR code with a different phone opens the same bike.
Keep the link short so the QR code scans
The whole configuration has to fit in the URL. The most direct approach is to convert it to JSON and encode it in base64, which pushes the URL past a thousand characters and makes the QR code too dense for a phone to scan. Dropping the prefixes that can be derived and keeping only a compact string brings it to about 120 characters.
- JSON plus base64over 1,000 charactersToo dense for a phone to scan
- Drop derivable prefixes
- Compact stringabout 120 characters
Performance runs through all four layers
A 3D configurator puts performance ahead of features. The full bike is stacked from models of more than a dozen parts, every part recalculates its position against the skeleton on each frame during folding and part swaps, and the page still has to open on a phone. When the picture stutters, the configuration flow breaks. These are the methods used on LIDROP:
- First-screen download is inventoried in rounds. After each build, every resource request is read and sorted by file extension, and each round removes only bytes that are never used at runtime. Round one went from about 57 MB to about 43 MB and round two to about 37 MB. A later version went from 36.5 MB to 32.5 MB, with 3D model files at about 80%.
- Compression is chosen on download plus decode time. The smallest format is not always the fastest or the lightest on memory, and every encoding is re-compressed from the original file before comparison. The figures are in 3D model optimization, before and after.
- Solid-color materials do not get high-resolution textures. Textures are checked one by one after decoding, and any that turn out to be a single color shrink to 4 × 4 with no visible change.
- Frame color textures load when selected, not all at once on entry.
- Rendering stops while the bike sits still and wakes for rotation, folding and color changes.
- Phones stay on 1K textures. On desktop, textures step up to 4K only when the camera moves in close.
The full process of measuring and budgeting is in Web 3D performance engineering.
Another example of seeing the finished product before paying is previewing a custom sign before payment.
When a configurator is not a fit
The following is the team's judgment. In these situations, skipping the configurator is the more reasonable call:
- Only wanting the site to look good. The effort in a configurator sits almost entirely in the seams between the four layers, and visuals are a small part.
- A simple product that one photo can explain. With no swappable parts, 3D only adds another load.
- Few enough options that a catalog is enough. With a few colors and a few sizes, a one-page catalog is clearer than a configurator and needs no models or rules to maintain.
- No reliable source for spec data. When data is still scattered across individual Excel files and versions disagree, organize the data first. A configurator prints errors straight onto the card the customer takes away.
Three things to prepare before an evaluation
To evaluate building a 3D configurator, prepare these three things:
- A complete list of options, noting which parts are mutually exclusive.
- Spec data for every option, and who is responsible for maintaining it.
- The source of the 3D models: existing modeling files, or models that need to be built from scratch.
Once those are ready, leave a short description of the product and the existing data on the contact page. The POLISH team reviews the options and data first and judges what each of the four layers lacks. When comparing vendors, ask each one to explain its approach to these four layers. Another article, evaluating a software vendor, covers more ways to judge.